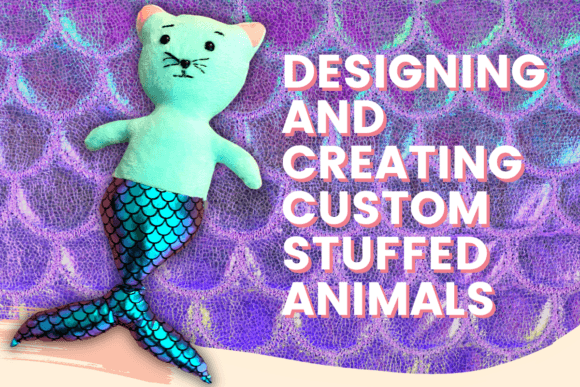
Designing and Creating Custom Stuffed Animals with Leslie Irene: A Step-by-Step Guide
The Joy of Crafting Your Own Stuffed Animal
There is something truly magical about creating a custom stuffed animal. It’s not just about sewing fabric together; it's about bringing a unique character to life, one stitch at a time. Whether you're looking to make a special gift for a loved one or simply want to explore your creative side, designing and creating your own stuffed animal can be an incredibly rewarding experience.
In this article, we’ll walk you through the process of making a custom stuffed animal with the help of Leslie Irene, a passionate and experienced craftsperson who has shared her expertise in a class on designing and sewing your very own stuffed animal. Leslie guides students through every step of the journey, from designing a pattern to selecting fabrics and mastering stitching techniques. This guide is perfect for both beginners and those with some sewing experience, offering a blend of creativity and practical skill-building.
Understanding the Basics of Stuffed Animal Design
Before diving into the actual creation of your stuffed animal, it's important to understand the basics of design. A well-thought-out design ensures that your finished product is not only adorable but also structurally sound. Leslie begins by emphasizing the importance of sketching out your ideas on paper before moving to fabric.
Designing a Pattern: The first step in any stuffed animal project is creating a pattern. You can either draw your own design or use a pre-made template. If you're new to this, start with simple shapes like circles, ovals, and triangles. Once you have your basic shape, you can add details such as ears, eyes, and limbs. Leslie recommends using tracing paper or a light table to ensure precision when transferring your design onto fabric.
Selecting Fabrics: Choosing the right fabric is crucial to the success of your project. Soft, durable materials like cotton or felt are ideal for stuffed animals. These fabrics are easy to sew and provide a nice texture that is comfortable to the touch. Leslie suggests experimenting with different patterns and colors to bring your design to life. Remember, the fabric should be able to hold up to repeated play and washing.
Essential Tools and Materials
Once you've designed your pattern and selected your fabric, the next step is gathering the necessary tools and materials. Having the right supplies on hand will make the process much smoother and more enjoyable. Here are some essentials:
- Sewing Machine: While hand-sewing is possible, a sewing machine can significantly speed up the process and produce cleaner seams.
- Scissors: Invest in a good pair of fabric scissors for cutting your pattern pieces accurately.
- Thread: Choose a thread that matches your fabric color. For durability, opt for a medium-weight thread.
- Pins and Seam Ripper: These are essential for holding your fabric pieces together and fixing any mistakes along the way.
- Filling: Polyester fiberfill is the most commonly used stuffing material because it’s soft, lightweight, and easy to work with.
You can find the patterns used in Leslie’s class attached on the right-hand side, under the session titled “Materials and Tools.” This makes it easy to get started without having to create your own designs from scratch.
Step-by-Step Process of Making a Stuffed Animal
Now that you have your design, fabric, and tools ready, it’s time to begin the actual creation of your stuffed animal. Follow these steps to bring your vision to life:
Step 1: Cut Out Your Pattern Pieces
Using your chosen fabric, carefully cut out all the pattern pieces. Make sure to leave a small seam allowance around each piece to allow for stitching. If you’re using multiple layers of fabric (like for a face), cut them separately and then layer them together before sewing.
Step 2: Sew the Pieces Together
Begin by sewing the main body of your stuffed animal. Start with the front and back pieces, then move on to the limbs and head. Use a straight stitch on your sewing machine for clean, even seams. If you’re hand-sewing, take your time to ensure that your stitches are tight and secure.
Tip: Always sew the pieces together in a way that allows you to turn them right-side out after sewing. This means leaving an opening in the back so you can stuff the animal once the seams are complete.
Step 3: Stuff the Animal
Once all the pieces are sewn together, it's time to stuff your animal. Begin by filling the body and limbs with polyester fiberfill, making sure to distribute the stuffing evenly. Be careful not to overstuff, as this can cause your animal to look lumpy or distorted. Use your fingers to push the stuffing into all the crevices and corners.
Step 4: Close the Opening
After stuffing your animal, sew the opening shut. If you’re using a sewing machine, reinforce the seam with a zigzag stitch to prevent it from coming apart. If you're hand-sewing, use a strong stitch like a backstitch for added durability.
Step 5: Add Final Details
Your stuffed animal is almost complete! Now it’s time to add the final touches. This includes attaching eyes, buttons, or other embellishments. Leslie encourages creativity here—use beads, felt, or even fabric paint to personalize your creation. Don’t forget to sew on any additional features like ears or tails.
The Benefits of Creating Custom Stuffed Animals
Making your own stuffed animal offers a wide range of benefits beyond just the joy of crafting. Here are a few reasons why this activity is worth exploring:
- Creative Expression: Designing and creating your own stuffed animal allows you to express your creativity in a tangible way. Every detail you choose contributes to the uniqueness of your final product.
- Stress Relief: Sewing and crafting can be a great way to relax and unwind. The repetitive nature of sewing can be meditative and calming, helping to reduce stress and anxiety.
- Educational Value: Learning to sew and create stuffed animals can teach valuable skills like measurement, pattern-making, and attention to detail. These skills are transferable to many other areas of life.
- Gift-Giving: A handmade stuffed animal makes a thoughtful and personalized gift. Whether it's for a child or a friend, the effort and love that go into creating it make it extra special.
Common Misconceptions About Stuffed Animal Making
Many people believe that creating a stuffed animal requires advanced sewing skills or expensive equipment. However, this is not the case. With the right guidance and a few basic tools, anyone can make a beautiful stuffed animal. Leslie emphasizes that even beginners can succeed with patience and practice.
Another common misconception is that the process is time-consuming. While it does require some time and effort, the satisfaction of completing a project often makes the time well worth it. Plus, there are many online tutorials and classes available to help you along the way.
Conclusion: Embrace the Magic of Stuffed Animal Creation
Designing and creating custom stuffed animals is a delightful and fulfilling hobby that offers endless possibilities for creativity and expression. Whether you're a beginner or an experienced sewer, the process of bringing your unique creation to life is sure to be a joyful experience.
Leslie Irene’s class provides a comprehensive and approachable guide to making your own stuffed animal, covering everything from designing a pattern to mastering stitching techniques. By following her step-by-step instructions, you'll gain the confidence and skills needed to create your very own one-of-a-kind companion.
So, grab your fabric, gather your tools, and embark on this delightful journey. The magic of sewing your very own stuffed animal awaits!